Scénario utilisateur
A leaflet will welcome visitors and provide the context to our prototype:
« What if an artist doesn’t want to reveal a part of their artworks? Years after Folon’s death the Folon Foundation stumbled upon piles of drawings in his atelier in Monaco. Works he never spoke about, that were never shown to the public…
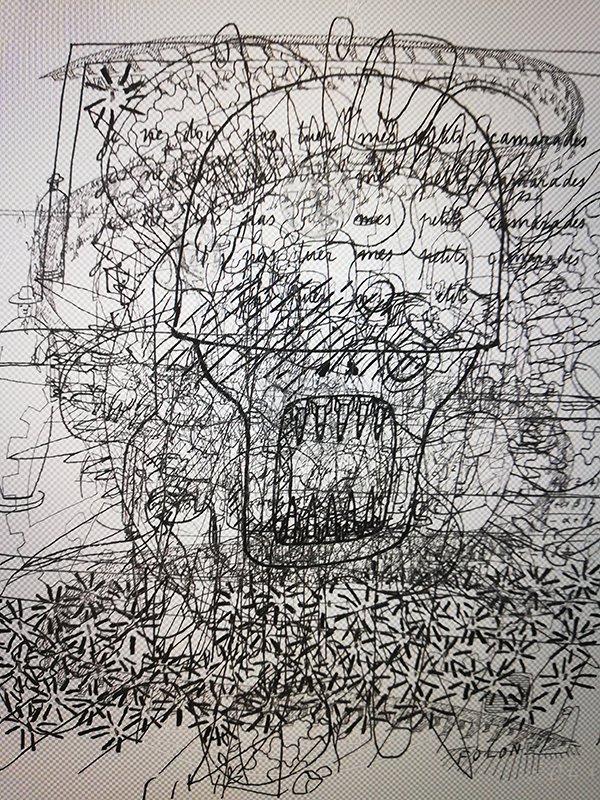
These drawings – made in the sixties and seventies – reveal many of Folon’s obsessions: hundreds of faces, thousands of arrows. They’re thought to have been an early inspiration for his later works.
‘Inside the Drawer’ takes you on a hidden journey through the museum. Look carefully for Folon’s early artworks popping up during your tour. Do you see the relationship with his later works? Follow Folon’s path and unveil, at the end of your visit, the unseen part of his early work.
Found a hidden artwork? Share it with us on Instagram with the mention @inside_the_drawer«
The hidden artworks – our three clues or teasers – are placed a different spots in the exhibition, in connection to the works already part of the exhibition: a falling paper, a disappearing paper and a metronome-powered sliding drawing.
The ‘piece de resistance’, our treasure, is the video mapping of Folon’s early drawings. As visitors enter a dark, atmospheric space, an animated version of one of Folon’s characteristic ‘arrow’ symbol leads their attention to a drawer located in the room. This drawer magically explodes and pages are projected flying out of the furniture onto the final pages of Folon’s book of life. The visual ends with a montage of the early sketches of Folon. Throughout, a voice tells the story of their discovery – by Stephanie Angelroth, Director of Fondation Folon, in French and by Cristina, the team’s communicator, in English. All sounds are custom designed from our project.
The visitor is invited to relive this moment and see how the story of Fondation Folon is being written each passing day. At the same time, the early origins of Folon’s artistic vocabulary are revealed.
« The history of Folon Foundation gets written with each passing day. Ten years after Folon’s death, we had the chance to access his studio in Monaco. We already knew this special place, but there were corners still to be explored. Little by little, we dared to become more intimate with this side of the artist. We dared to open the cupboards and discovered small treasures. »

Intentions & Processes
DAY 1, MORNING: First meeting of our #DreamTeam
Our team of Museomixers met up for the first time and we got stated with a introductory round and a first look at what fellow Museomixers had suggested about our playground, ‘The Unseen’. Here is the brief outlining our challenge for the three days:

Stephanie Angelroth, Director of Folon Foundation, stopped by and told us the story of the discovery, by the Fondation Folon, after the death of Folon’s second wife, of a treasure of material inside a bathroom cupboard. The bathroom was located inside Folon’s studio in Monaco. She shared with us the publications ‘Humour Blanc’ and ‘Photos Graphiques’ that have already compiled some of the previously unseen early work by Folon.

DAY 1, AFTER LUNCH: Brainstorm, Brainstorm, Brainstorm
We agreed on some principles that we wanted to respect:
- Folon designed his museum as a work of art that would stand on its own, so we don’t want to make great changes in the scenography
- Folon never showed his drawings to others, it seems like he wanted to keep them hidden. Some of the pictures have been shown but very few of them. We should respect this sense of privacy.
- The museum is for everyone. We want to make the experience inclusive and offer something that can enchant everybody. (e.g. with a VR or AR experience, we are not everyone has a smartphone, so it risks exclude certain audiences)
- Interactivity is key
To make this happen, we thought about places where we could exhibit: the ceiling because it’s not actually part of the scenography), the mirror (cool for presentations), technical spaces,…
The links between the drawings and photographs and the works in the museum are very interesting. We like the travel diaries but there is not much information about them (whereabouts of Folon). (Note: it is possible to read the handwriting of Folon). We all agree to work with the drawings and photographs.
We have some crazy ideas: e.g. after the visitor ends his or her visit, we can prompt them to visit the museum again backwards with more information, or making a cluedo, escape room or treasure hunt…
DAY 1, AFTERNOON: Another look at Fondation Folon
We booked a private visit of the museum with a member of the museum staff, asked a lot of questions and definitely found a lot of hidden places. Do you know there are a lot of (small) rooms behind the exposition panels, for technical aspects? Some of us had never seen the second part of the museum so there were spaces there that gave us a lot of inspiration.
DAY 1, LATE AFTERNOON: Our first prototype
Concept: Since we want to respect the scenography we had a hard discussion about the place to show the works. Some wanted to show the works completely outside the exhibition space, while others wanted to keep the strong link between the early unseen works and current works being shown in the exhibition and do something throughout the museum. And then we saw the light – that we can combine both aspects. We decided to place pieces of paper that disappear when the visitor comes closer, at several points in the exhibition. These are unseen artworks and meanwhile we will just give some clues of the works (the secret of Folon). We want to place our installation just outside the visit (at the end, after one leaves the book of Folon’s life). We all agree that at this point the scenography of Folon stops (there’s the gift shop right after, as you know).


Name: Curious cabinet (cabinet de curiosité) or an invisible journey? After an etymological discussion about cabinets and cupboards we choose to go for a “drawer” in the title to keep a strong link with Stephanie’s discovery of Folon’s works.
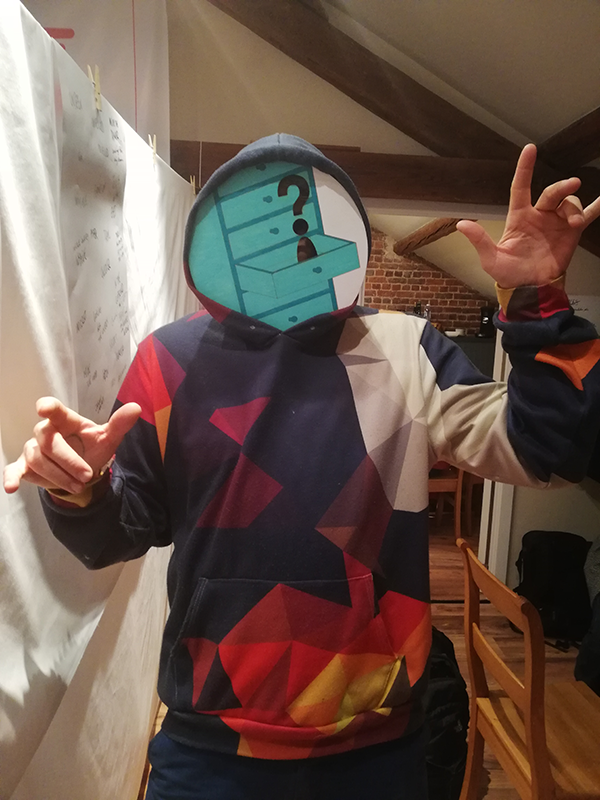
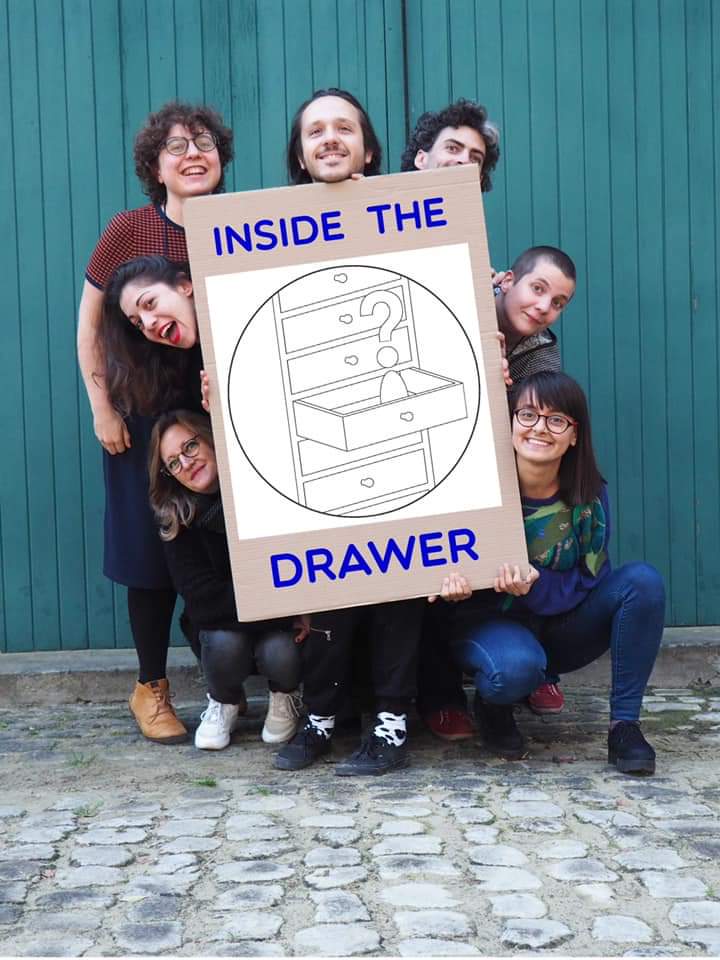
![]() Logo: Our graphic designer drew our title literally, as a visual representation of the story we wanted to tell. The drawer is open and instead of seeing the drawings inside, we see a representative character from Folon’s works, with a question mark for a head. This is for us a way to express Folon’s identity. The question mark also hints to a question we had: why did Folon chose not to present this work to the public, keeping it secrete . A little research question during our journey that lead us to the current prototype.
Logo: Our graphic designer drew our title literally, as a visual representation of the story we wanted to tell. The drawer is open and instead of seeing the drawings inside, we see a representative character from Folon’s works, with a question mark for a head. This is for us a way to express Folon’s identity. The question mark also hints to a question we had: why did Folon chose not to present this work to the public, keeping it secrete . A little research question during our journey that lead us to the current prototype.
DAY 1, EVENING: First pitch to #MuseomixBE
During the plenary, a lot of interesting ideas and questions come from the public:
- To use a kind of gamification, a kind of escape room to unlock the drawings. One of the mentors mentions an app, a kind of “Pokemon hunting” game. In hindsight, we are not too sure about this one, as we don’t want the public to be disturbed away from the artworks and spend too much time on their phone. And anyway, not everybody has an smartphone (remember our key principles, mentioned at the beginning)
- Why we chose to place the experience at the end of the museum. The concern is that there is a chronology in the presentation of Folon’s works and with out prototype it would mean the photographs and drawings made in the 50s, 60s and 70s come at the very end. For us, since the discovery of the drawings happened a few years ago, well after Folon’s death, it makes sense to present this as something outside of Folon’s own journey: it’s part of the history of the foundation, outside of Folon’s life. It’s a new element.
DAY 2, MORNING: Filling in the details
The final installation: There is no more ‘peace at the end of the museum’ since we started to place the projector, literally placing light at the end of the tunnel/book of Folon’s life. First we experiment with a normal projector (but actually we would love to have a wide angle). Our graphic designer starts working with the digital files to generate an animation for this space: the first idea is to make drawings fly on the pages of the book. Our coder installs Kinect technology to trigger the animation as visitors enter the space.
The route: Our team identifies the spots where Folon’s artworks will appear and disappear; it’s the birth moment of the idea to use a metronome to generate the movement of the artworks.
DAY 2, AFTERNOON: Getting the story right
Stéphanie, director of Fondation Folon, agrees to help us tell the story (and being recorded) for our prototype. Our team works with her on a script written in the voice of the Foundation.
With some amazing support from the TechLab, we process the files and record some extra sounds: a wooden drawer opening and closing, pages flicking…
We choose three drawings to make appear in the museum. At this point, we dropped the photographs as they don’t fit 100 percent in our story (they were found in different locations, not all in the drawer we had in mind). Our graphic designer moves towards an animation of the drawings, showing them in interaction one with the other. Our maker starts building some cool mechanical things to make appear and disappear the drawings (and a support for the projector). We find a wide angle projector so we re-calibrate.
DAY 2, EVENING: Drawing the line at the end of Day 2
The wide angle-projector don’t likes our team; there are problems with the resolution of the presentation and the focus, so we go back to an imperfect solution. While we can’t cover the whole book, the quality will be better. While the graphic magic is happening in Adobe Premiere (Maria is pleased with the way she made the animations transition in relation to each other), the rest of the team is working on the set up:

- making and hanging the curtains to make our immersive space really dark. It was our content manager, Lieze’s first time stapling with the staple gun; definitely the beginning of her career as a maker – see her next year!
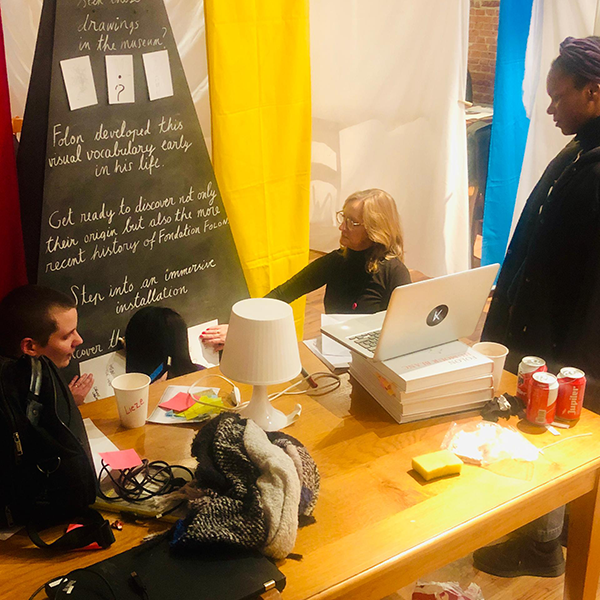
- the text for the panel that will introduce the prototype to the public. Cristina, Cathy and Claire decide to stick onto it photos of the drawings hidden in the museum. They try to write the text in chalk in Folon’s cursive handwriting but this is rather unsuccessful; plus, Cristina’s handwriting droops to the right, and Cathy and Claire have to help her keep straight lines.

DAY 3: Bringing it all together
A first version of the video mapping is ready for rendering. We realise we haven’t yet thought of the speakers – although our sound files are clean and ready. Our team is either making and installing, or following up and documenting the process so that we can share with you below the ingredients to ‘the recipe of ‘Inside the Drawer », have a look below!
Outils et techniques
CLUE 1: The Falling Drawing
We needed: 1 servo motor; 1 Arduino (micro controller); 1 power supply; 1 (wood) stick; 1 (wood) support; 1 print of a drawing (A6).
Already available in our space: Exhibition panel
Steps to follow:
- Coding:
- Connect the card to the computer
- Use existing code “Servo Sweep”
- Transfer the code onto the micro-controller
- Adjust the values to get the required amplitude & movement speed
- Assembling:
- Screw the stick onto the servo motor
- Screw the servo motor onto the support
- Nail the picture onto the stick
- Placing:
- Place the falling-paper-device on top of the panel
CLUE 2: The Disappearing paper (NB: this uses the mechanic as CLUE 1, it is just placed in another location)
We needed: 1 servo motor; 1 Arduino (micro controller); 1 power supply; 1 (wood) stick; 1 (wood) support; 1 print of a drawing (A6).
Already available in our space: Exhibition panel (with some space behind and under the panel)
Steps to follow:
- Coding:
- Connect the card to the computer
- Use existing code “Servo Sweep”
- Transfer the code onto the micro-controller
- Adjust the values to get the required amplitude & movement speed
- Assembling:
- Screw the stick onto the servo motor
- Screw the servo motor onto the support
- Nail the picture onto the stick
- Placing
- Place the disappearing-paper-device behind the panel, so the paper appears from under the panel
CLUE 3: The Metronome
We needed: 1 metronome; 1 print of a drawing (A6).
Already available in our space: Exhibition cabinet
Steps to follow:
- Assembling:
- Glue the print on the metronome
- Placing
- Place it behind the cupboard
TREASURE – The Videomapping

What we needed: 1 projector (normal one); 1 Kinect; 2 large speakers; 1 portable USB speaker; 1 laptop;
- (lot of) connecting cables
- 2 black curtains (Ikea, measuring 1.5 x 2.5) – Note: the textile was too transparent, we had to double it to obtain the desired effect
- Light filters (blue; to dim the lights in the space right before our space)
Already available in our space: A cupboard with drawers; A large mirror; A rail for the curtains.
Steps to follow:
- Stereo recording of the voice of Stéphanie (French)/Cristina (English)
- Stereo recording of the sounds of pages flicking and of a drawer opening
- Making 3D-model of the room with photogrammetry
- Making video animation based on the arrow-drawing of Folon
- Making treasure video (opening of the drawer, sketches flying out on the surface of the book)
- Synchronising video and sound design
- Programming the Kinect (trigger zone: entering the room)
Steps to follow, more in depth:
- LIGHT
- Place blue filters on the lights in the space just before the ‘treasure room’ – Note: we want to keep a serene atmosphere before entering the treasure room
- Place the curtains to close the opening between the treasure room and the shop – Note: we stapled the textile on a wooden bar and used straps to fasten it to the rail (already there)
- PROJECTION
- Place the projector on top of the book (in the corner, see sketch) – Note: we used a chair on top of the book (to have the right projection-angle), and some tape to be sure it will stay in place (safety first)
- Place the projector-cables on the book and behind the cupboard (see sketch)
- Connect computer and projector
- Make sure the projection reflects in the mirror (on the cupboard and book)
- SOUND
- Place the 2 large speakers in the room (use a little angle, just to make sure the stereo is working)
- Place the small USB-speaker in the drawer
- Connect speakers with the computer
- TRIGGER
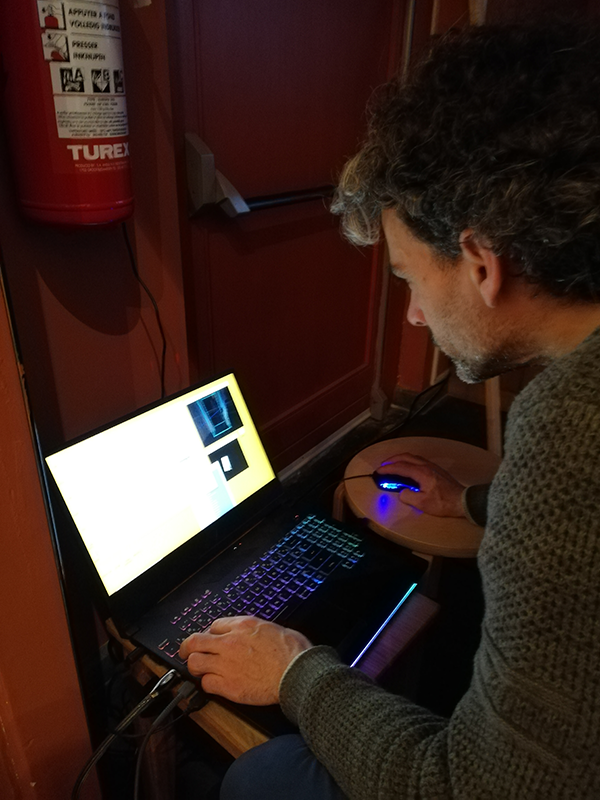
- Place the Kinect on top of the fire extinguisher
- Connect Kinect with the computer
L'équipe
- Claire Allard, facilitator – Claire discovered the concept of ‘fractals’ and can’t stop thinking about it
- Cathy Becq, mediator – Cathy found out about the role and functions of a mediator in the museum world
- Kilian Delcorte, maker
- Maria Ilia, graphic designer – Maria experienced for the first time raclette
- Aurélien Meceron, coder
- Lieze Neyts, content manager – Lieze tried for the first time a staple gun; watch out Museomix 2020, she’ll be back as a maker